そのため情報が古い可能性があります。ご了承ください。m(_ _)m
いつからか不明だけど、気付いたらアクセスできず。
再起動したら赤いLEDが6回ほど点滅を繰り返す始末。
玄箱のHDDがダメになったのは、これで2回目。
初代玄箱(GbEじゃない奴)だから、もう引退させるかな。。
玄箱からHDD取り外して、別のPCへ接続してみても認識しない。困った。。
室内温度が40℃越えるのがマズイのかな。
いつからか不明だけど、気付いたらアクセスできず。
再起動したら赤いLEDが6回ほど点滅を繰り返す始末。
玄箱のHDDがダメになったのは、これで2回目。
初代玄箱(GbEじゃない奴)だから、もう引退させるかな。。
玄箱からHDD取り外して、別のPCへ接続してみても認識しない。困った。。
室内温度が40℃越えるのがマズイのかな。
http://www.sonyericsson.co.jp/product/accessories/mw600/
ヨドバシ・ドットコムにて。
「“ケータイ・快適・ワイヤレス”GEAR-UPキャンペーン™」で、4,000円分の電子マネー(Edy)が還元されたので、実質10,800 – 4,000 = 6,800円でした。
ワイヤレスステレオヘッドセットなる物を今まで使ったことがないので、比較することは出来ないですが。所感でも。
概ね満足。
BRAVIA Phone S004購入した後、1週間使ってみた感想をテキトーに列挙。(取扱説明書は一応見た)
ヘビーユーザーじゃないから、「サクサクさ」と「マルチタスク」が出来るようになっただけで、十分満足だったりするけど、W51Sより劣化している部分は何とかならないものか。スマートフォンだとアップデートで機能追加が期待できるけど、S004とかだと無理でしょうけど。
なんというか最新機種を触っている感じが全くしなかったのがアレだ。au主導だと一生docomoに勝てないような。
wordpressから、昔の投稿を取り出そうとすると、WindowsLiveWriterがこんなことを言ってきます。
正確には、
ブログ サーバーから受信した metaWeblog.getRecentPosts メソッドへの応答が無効です。
Invalid response document returned from XmlRpc server
しばらく原因不明だったけど、
WORDPRESSを3.0に。 « qos webmaster’s blog
で、mbstring.func_overload を0に設定を変更した以降、エラーにならず正常に昔の投稿記事が取り出せるようになってました。
mbstring.func_overload = 2
に戻すと、
Invalid response document returned from XmlRpc server
って言ってくるので、mbstring.func_overloadが原因なのは確定っぽいです。
データ内容と、データの長さが一致しなくて解析に失敗したのかな~
元が2.9だったので、http://ja.wordpress.org/からzipファイルを持ってきて、展開してコピーしただけ。
自動アップグレードが出来るようになってるのか?と試してみたら、相変わらずFTPの情報を聞いてくるのでヤメ。
・・・ と思ったけど、なんとなくwordpress auto update ftpでググってみると、
WORDPRESS AUTOMATIC UPDATE ASKING FOR FTP
がヒット。なんでも、
WordPress can update without FTP
きっとFTP無しでもアップデート出来るよ。って、言ってるに違い有りません。さらに、
・・・
I had incorrect permissions on my files. When the user that apache runs as can write to the wordpress directories, then the upgrade stuff all just works!
・・・
Apacheを動かすユーザ(FreeBSDだとデフォルトは、wwwっていうユーザが動かしている)が、wordpressのディレクトリ 配下に書き込めるようにすればアップグレードできるよ。
って、きっと言ってます。
なので、
sudo chown -R www wordpress
みたいにやって、所有者変えるとか、パーミッション変えるとかして、書き込めるようにすると良い。
実際やってみたら出来るようになりました~。
単にパーミッションが間違えていただけとは。。よく考えりゃ分かることだなぁ。。。orz
諦めt(ry
追記
プラグインを自動アップグレードしようとすると、
互換性のないアーカイブ。 PCLZIP_ERR_BAD_FORMAT (-10) : Invalid End of Central Dir Record size : 14互換性のないアーカイブ。 PCLZIP_ERR_BAD_FORMAT (-10) : Invalid End of Central Dir Record size : 14
みたいなエラーになることがあった。必ずじゃないけど。
ググったら
[wordpress] [php] PCLZIP_ERR_BAD_FORMAT (-10) と出てプラグインのアップグレードが出来ない « 雑記帳
がヒットして、php.iniのmbstring.func_overloadが悪さをしているという話らしい。
たしかに、mbstring.func_overloadを0に設定すれば 、アップグレード出来るようになった。
mbstring.func_overload は、設定値によって、何をオーバーロード(既存関数の上書き)するかが決まる設定だそうです。
0にしたことで不都合があるかどうかは不明。。
近所のauショップには在庫が無いって言われたので、白ロムを28,000くらいで購入。
W51Sからの機種変更だから3~4年振りくらいの機種変更。
テキトーに写真取って見た。
指紋がバリバリつくなぁ。。現在、W51Sのデータ移行中。
apacheのエラーログに、↓こんなのが。
[Sun May 23 19:59:03 2010] [error] [client 192.168.0.2] PHP Fatal error: Call to undefined function apply_filters() in /usr/local/www/apache22/data/wordpress/wp-content/plugins/hyper-cache/cache.php on line 229
数時間あれこれ調べた結果、MySQLサーバが落ちてただけだった。。orz
携帯電話キーボード Rboard for Keitai|RBK-2000シリーズ

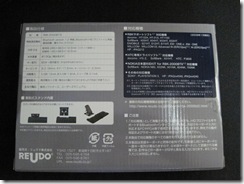
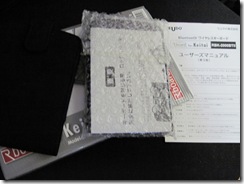
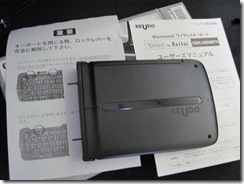
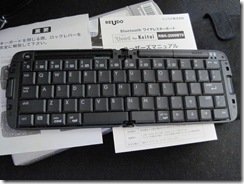


少し使ってみた感じの感想。
良いところ
残念なところ
このキーボード使ってる時だけ、キー配置変更するとか出来ないんだろうか。。
このキーボード購入のついでに単4型のエネループも購入。
(追記)
Bluetoothアダプタは、BT-Mini2EDRで難なくペアリング出来た。
1時間分のチャートしか見れなくて不便。
もう少し長い時間見れる方法が無いか探したところ、
ESXi – extend performance data to 36 hours
By default a standalone ESXi host will keep 1 hours worth of performance data. vCenter Server will allow you to capture performance data long term, but if you have just the standalone ESXi host you can extend the capture of performance data to 36 hours with just a simple configuration change. This change will require SSH or console access and is not supported.
と書いてあった。設定をちょっと変更するだけで、36時間分のチャートが見れるようになるらしい。
/etc/vmware/hostd # vi config.xml
      </proxysvc>

      <statssvc>
         <path>libstatssvc.so</path>
         <enableMockup>false</enableMockup>

         <!-- Directory to store stats related files in -->
         <!-- <depotDir> /var/lib/vmware/hostd/stats/ </depotDir> -->

         <!-- Name of the StatsDepot -->
         <!-- <depotName> hostAgentStats </depotName> -->

         <!-- Max number of stats to purge in one shot -->
         <!-- <maxStatsPurged> 1000 </maxStatsPurged> -->

         <!-- Real time stats collection interval -->
         <!-- <collectionInterval> 20 </collectionInterval> -->

         <!-- Enable historical stats collection -->
         <historicalStatsEnabled> true </historicalStatsEnabled>

      </statssvc>
/etc/vmware/hostd # services.sh restart
Running sfcbd-watchdog stop
Running wsman stop
Stopping openwsmand
Running slpd stop
Stopping slpd
Running vobd stop
watchdog-vobd: Terminating watchdog with PID 5064
Vobd stopped.
Running hostd stop
watchdog-hostd: Terminating watchdog with PID 5042
Running ntpd stop
Stopping ntpd
Running ntpd restart
Starting ntpd
Running hostd restart
mount: mounting visorfs on /var/lib/vmware/hostd/stats failed: File exists
Running vobd restart
[16158571] Begin 'hostd ++min=0,swap,group=hostd /etc/vmware/hostd/config.xml', min-uptime = 60, max-quick-failures = 1, max-total-failures = 1000000
Vobd started.
Running slpd restart
Starting slpd
Running wsman restart
Starting openwsmand
Running sfcbd-watchdog restart
素晴らしい~!
VertrigoServは、Apache、MySQL、PHP等々をいっぺんにインストールしてくれるツール。
redmineはタスク(プロジェクト?)管理ツール。
thinは軽量Webサーバ(?)
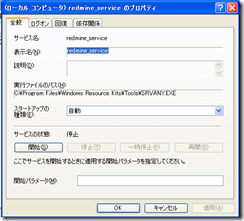
VertrigoServがインストールされた環境に、redmine入れて、かつ、thinもインストールして、端末起動したらredmineがすぐ使えるようにサービス化してしまおう。と。
VertrigoServとredmine、thinのインストールは省略。
サービス化の部分だけ。
how to configure a rails app (redmine) to run as a service on windows?
基本、↑の通り。
The service was successfuly added!

Make sure that you go into the Control Panel and use
the Services applet to change the Account Name and
Password that this newly installed service will use
for its Security Context.
Windows Registry Editor Version 5.00

[HKEY_LOCAL_MACHINE\SYSTEM\CurrentControlSet\Services\redmine_service]
"Type"=dword:00000010
"Start"=dword:00000002
"ErrorControl"=dword:00000001
"ImagePath"=hex(2):43,00,3a,00,5c,00,50,00,72,00,6f,00,67,00,72,00,61,00,6d,00,\
  20,00,46,00,69,00,6c,00,65,00,73,00,5c,00,57,00,69,00,6e,00,64,00,6f,00,77,\
  00,73,00,20,00,52,00,65,00,73,00,6f,00,75,00,72,00,63,00,65,00,20,00,4b,00,\
  69,00,74,00,73,00,5c,00,54,00,6f,00,6f,00,6c,00,73,00,5c,00,53,00,52,00,56,\
  00,41,00,4e,00,59,00,2e,00,45,00,58,00,45,00,00,00
"DisplayName"="redmine_service"
"ObjectName"="LocalSystem"

[HKEY_LOCAL_MACHINE\SYSTEM\CurrentControlSet\Services\redmine_service\Security]
"Security"=hex:01,00,14,80,90,00,00,00,9c,00,00,00,14,00,00,00,30,00,00,00,02,\
  00,1c,00,01,00,00,00,02,80,14,00,ff,01,0f,00,01,01,00,00,00,00,00,01,00,00,\
  00,00,02,00,60,00,04,00,00,00,00,00,14,00,fd,01,02,00,01,01,00,00,00,00,00,\
  05,12,00,00,00,00,00,18,00,ff,01,0f,00,01,02,00,00,00,00,00,05,20,00,00,00,\
  20,02,00,00,00,00,14,00,8d,01,02,00,01,01,00,00,00,00,00,05,0b,00,00,00,00,\
  00,18,00,fd,01,02,00,01,02,00,00,00,00,00,05,20,00,00,00,23,02,00,00,01,01,\
  00,00,00,00,00,05,12,00,00,00,01,01,00,00,00,00,00,05,12,00,00,00
Applicationは、Ruby.exeのフルパス。例えば、C:\ruby\bin\Ruby.exe
AppParametersは、thinとthinに渡すパラメータ。例えば、c:\ruby\bin\thin start -p 4000 -e production
AppDirectoryは、redmineをインストールした場所。例えば、C:\public_html\redmine
Windows Registry Editor Version 5.00

[HKEY_LOCAL_MACHINE\SYSTEM\CurrentControlSet\Services\redmine_service]
"Type"=dword:00000010
"Start"=dword:00000002
"ErrorControl"=dword:00000001
"ImagePath"=hex(2):43,00,3a,00,5c,00,50,00,72,00,6f,00,67,00,72,00,61,00,6d,00,\
  20,00,46,00,69,00,6c,00,65,00,73,00,5c,00,57,00,69,00,6e,00,64,00,6f,00,77,\
  00,73,00,20,00,52,00,65,00,73,00,6f,00,75,00,72,00,63,00,65,00,20,00,4b,00,\
  69,00,74,00,73,00,5c,00,54,00,6f,00,6f,00,6c,00,73,00,5c,00,53,00,52,00,56,\
  00,41,00,4e,00,59,00,2e,00,45,00,58,00,45,00,00,00
"DisplayName"="redmine_service"
"ObjectName"="LocalSystem"

[HKEY_LOCAL_MACHINE\SYSTEM\CurrentControlSet\Services\redmine_service\Parameters]
"Application"="C:\\ruby\\bin\\Ruby.exe"
"AppParameters"="c:\\ruby\\bin\\thin start -p 4000 -e production"
"AppDirectory"="c:\\redmine"

[HKEY_LOCAL_MACHINE\SYSTEM\CurrentControlSet\Services\redmine_service\Security]
"Security"=hex:01,00,14,80,90,00,00,00,9c,00,00,00,14,00,00,00,30,00,00,00,02,\
  00,1c,00,01,00,00,00,02,80,14,00,ff,01,0f,00,01,01,00,00,00,00,00,01,00,00,\
  00,00,02,00,60,00,04,00,00,00,00,00,14,00,fd,01,02,00,01,01,00,00,00,00,00,\
  05,12,00,00,00,00,00,18,00,ff,01,0f,00,01,02,00,00,00,00,00,05,20,00,00,00,\
  20,02,00,00,00,00,14,00,8d,01,02,00,01,01,00,00,00,00,00,05,0b,00,00,00,00,\
  00,18,00,fd,01,02,00,01,02,00,00,00,00,00,05,20,00,00,00,23,02,00,00,01,01,\
  00,00,00,00,00,05,12,00,00,00,01,01,00,00,00,00,00,05,12,00,00,00
以上で、redmineがサービスとして起動するようになったと思います。
試しに、コマンドラインで、
net start redmine_service
と打ってみると、起動すると思います。(起動しない場合は、Application、AppParameters、AppDirectoryらへんの、パスが間違っているかもしれません。)
めでたしめでたし。
・・・とは、行かず、自動に設定しているのに、端末起動時に自動的にredmineが動作しないという現象が発生しました。
起動タイミングが早いのか!?と思って、C:\ruby\bin\thinの中に、sleepを入れてみたりもしましたが、ダメでした。
how to configure a rails app (redmine) to run as a service on windows?
を再度見直したところ、以下が。
sc config redmine_xxx start= auto dependency= MySql
MySqlに依存するようにすれば良いのか!?ってことで、コマンドで、
sc config redmine_service depend= “Vertrigo_MySQL/Vertrigo_Apache”
を実行して端末を再起動してみたところ、端末起動と同時にredmineも起動しました!!(Vertrigo_Apacheは念のため)
(追記)
Resource Tool Kits入れなくても、SCコマンドだけで出来るな。と今思った。