そのため情報が古い可能性があります。ご了承ください。m(_ _)m
HDD2台(Seagate ST32000542AS, Samsung HD204UI)購入した、ST32000542ASの方は、ESXiのデータストアとして使用することに。
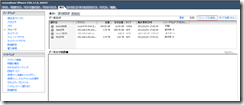
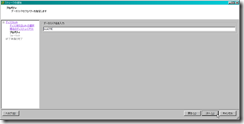
HDDをESXiサーバに接続した後、起動して、VMware vSphere Clientで、「構成」タブを表示してストレージ ストレージの追加を選択する。
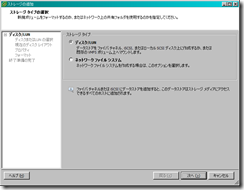
ディスク/LUNを選択。
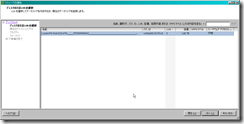
追加したHDDが出てくるので、選択して次へ。
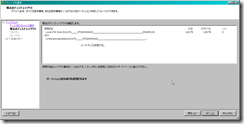
購入したばっかなので、空。
適当に名前を付ける。
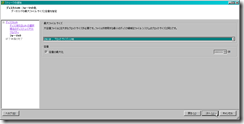
最大ファイルサイズは256GBで十分でしょう。
256GBを越えるような仮想ディスクを作る予定無いし。
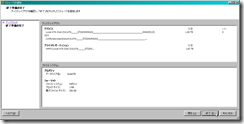
終了。
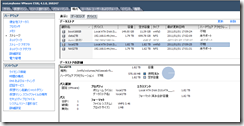
データストアに追加される。
・・・あれ?HD204UIの時は、フォーマットに5時間強掛かったのに・・・。WindowsXPだったけど。
フォーマットとか、エラーチェックはしないんだろうか??
とか考えてたら、急にS.M.A.R.Tを見たくなった。
でも、ESXiにsmartmontools無いし、コンパイラも無いし、クロスコンパイル環境準備するのも面倒そうだし。。
ってことで、何か楽な方法が無いか探したところ、RDM(Raw Device Mapping)で出来そうな気が。
本来VMは、ESXiサーバ上の物理デバイスを直接見ることが出来ないけど、RDMという仕組みを使えば見れるっぽい。
↓こんな。
1. ESXiサーバ上で、RDMを作る
2. 作成したRDMを、VMにデバイスとして追加する
3. VM上で追加したデバイスにアクセスする
「Creating RDMs on SATA drives」がかなり分かり易かったので、参照しながら、ST32000542ASのRDMを作成して、適当なVMにRDMなディスクを追加してsmartctlでS.M.A.R.Tを見てみる。
ESXiサーバにsshで接続して、適当なデータストアへ移動
You have activated Tech Support Mode.

The time and date of this activation have been sent to the system logs.
VMware offers supported, powerful system administration tools. Please
see www.vmware.com/go/sysadmintools for details.
Tech Support Mode may be disabled by an administrative user.
Please consult the ESXi Configuration Guide for additional
important information.
~ # cd /vmfs/volumes/4b6d9e06-eacb4270-750d-002185ac0e72
/vmfs/volumes/4b6d9e06-eacb4270-750d-002185ac0e72 #
「fdisk -l」 で追加したHDDの情報を取得
/vmfs/volumes/4b6d9e06-eacb4270-750d-002185ac0e72 # fdisk -l
Disk /dev/disks/t10.ATA_____ST32000542AS________________________________________5XW29CLR: 2000.3 GB, 2000398934016 bytes
255 heads, 63 sectors/track, 243201 cylinders
Units = cylinders of 16065 * 512 = 8225280 bytes
Device Boot Start End Blocks Id System
/dev/disks/t10.ATA_____ST32000542AS________________________________________5XW29CLRp1 1 243201 1953511968+ fb VMFS
・・・
/dev/disks/mpx.vmhba32:C0:T0:L0p1 5 900 917504 5 Extended
/dev/disks/mpx.vmhba32:C0:T0:L0p4 * 1 4 4080 4 FAT16 <32M
/dev/disks/mpx.vmhba32:C0:T0:L0p5 5 254 255984 6 FAT16
/dev/disks/mpx.vmhba32:C0:T0:L0p6 255 504 255984 6 FAT16
/dev/disks/mpx.vmhba32:C0:T0:L0p7 505 614 112624 fc VMKcore
/dev/disks/mpx.vmhba32:C0:T0:L0p8 615 900 292848 6 FAT16
Partition table entries are not in disk order
次に、/dev/disks/内にある追加したHDD(ST32000542AS)に関連するシンボリックリンクを見る。
/vmfs/volumes/4b6d9e06-eacb4270-750d-002185ac0e72 # ls /dev/disks/ -l

-rw-------    1 root     root         4009754624 Jan  1 09:37 mpx.vmhba32:C0:T0:L0

-rw-------    1 root     root          939524096 Jan  1 09:37 mpx.vmhba32:C0:T0:L0:1

-rw-------    1 root     root            4177920 Jan  1 09:37 mpx.vmhba32:C0:T0:L0:4

-rw-------    1 root     root          262127616 Jan  1 09:37 mpx.vmhba32:C0:T0:L0:5

-rw-------    1 root     root          262127616 Jan  1 09:37 mpx.vmhba32:C0:T0:L0:6

-rw-------    1 root     root          115326976 Jan  1 09:37 mpx.vmhba32:C0:T0:L0:7

-rw-------    1 root     root          299876352 Jan  1 09:37 mpx.vmhba32:C0:T0:L0:8

-rw-------    1 root     root      2000398934016 Jan  1 09:37 t10.ATA_____Hitachi_HDS722020ALA330_______________________JK1130YAH35L4T

-rw-------    1 root     root      2000396289024 Jan  1 09:37 t10.ATA_____Hitachi_HDS722020ALA330_______________________JK1130YAH35L4T:2

-rw-------    1 root     root       160041885696 Jan  1 09:37 t10.ATA_____ST3160815AS_________________________________________5RXBT94D

-rw-------    1 root     root       160039207424 Jan  1 09:37 t10.ATA_____ST3160815AS_________________________________________5RXBT94D:1

-rw-------    1 root     root      2000398934016 Jan  1 09:37 t10.ATA_____ST32000542AS________________________________________5XW29CLR

-rw-------    1 root     root      2000396255744 Jan  1 09:37 t10.ATA_____ST32000542AS________________________________________5XW29CLR:1

lrwxrwxrwx    1 root     root                 20 Jan  1 09:37 vml.0000000000766d68626133323a303a30 -> mpx.vmhba32:C0:T0:L0

lrwxrwxrwx    1 root     root                 22 Jan  1 09:37 vml.0000000000766d68626133323a303a30:1 -> mpx.vmhba32:C0:T0:L0:1

lrwxrwxrwx    1 root     root                 22 Jan  1 09:37 vml.0000000000766d68626133323a303a30:4 -> mpx.vmhba32:C0:T0:L0:4

lrwxrwxrwx    1 root     root                 22 Jan  1 09:37 vml.0000000000766d68626133323a303a30:5 -> mpx.vmhba32:C0:T0:L0:5

lrwxrwxrwx    1 root     root                 22 Jan  1 09:37 vml.0000000000766d68626133323a303a30:6 -> mpx.vmhba32:C0:T0:L0:6

lrwxrwxrwx    1 root     root                 22 Jan  1 09:37 vml.0000000000766d68626133323a303a30:7 -> mpx.vmhba32:C0:T0:L0:7

lrwxrwxrwx    1 root     root                 22 Jan  1 09:37 vml.0000000000766d68626133323a303a30:8 -> mpx.vmhba32:C0:T0:L0:8

lrwxrwxrwx    1 root     root                 72 Jan  1 09:37 vml.01000000002020202020202020202020203552584254393444535433313630 -> t10.ATA_____ST3160815AS_________________________________________5RXBT94D

lrwxrwxrwx    1 root     root                 74 Jan  1 09:37 vml.01000000002020202020202020202020203552584254393444535433313630:1 -> t10.ATA_____ST3160815AS_________________________________________5RXBT94D:1

lrwxrwxrwx    1 root     root                 72 Jan  1 09:37 vml.01000000002020202020202020202020203558573239434c52535433323030 -> t10.ATA_____ST32000542AS________________________________________5XW29CLR

lrwxrwxrwx    1 root     root                 74 Jan  1 09:37 vml.01000000002020202020202020202020203558573239434c52535433323030:1 -> t10.ATA_____ST32000542AS________________________________________5XW29CLR:1

lrwxrwxrwx    1 root     root                 72 Jan  1 09:37 vml.01000000002020202020204a4b3131333059414833354c3454486974616368 -> t10.ATA_____Hitachi_HDS722020ALA330_______________________JK1130YAH35L4T

lrwxrwxrwx    1 root     root                 74 Jan  1 09:37 vml.01000000002020202020204a4b3131333059414833354c3454486974616368:2 -> t10.ATA_____Hitachi_HDS722020ALA330_______________________JK1130YAH35L4T:2
抜き出すと、↓。
lrwxrwxrwx    1 root     root                 72 Jan  1 09:37 vml.01000000002020202020202020202020203558573239434c52535433323030 -> t10.ATA_____ST32000542AS________________________________________5XW29CLR

lrwxrwxrwx    1 root     root                 74 Jan  1 09:37 vml.01000000002020202020202020202020203558573239434c52535433323030:1 -> t10.ATA_____ST32000542AS________________________________________5XW29CLR:1
この前者のファイル名をコピーしておく。
次に、vmkfstools(VMとかvmdkをあれこれ操作するツール?)を使ってRDMを作る。
/vmfs/volumes/4b6d9e06-eacb4270-750d-002185ac0e72 # vmkfstools -r /vmfs/devices/disks/vml.01000000002020202020202020202020203558573239434c52535433323030 local2TB.vmdk -a lsilogic

/vmfs/volumes/4b6d9e06-eacb4270-750d-002185ac0e72 # ls -alrt

・・・

-rw-------    1 root     root                487 Jan  1 09:38 local2TB.vmdk

-rw-------    1 root     root      2000398934016 Jan  1 09:38 local2TB-rdm.vmdk

・・・
# -r: その後に続くディスクに対するRDMを生成
# -a: アダプタ指定(buslogic | lsilogic | ide)
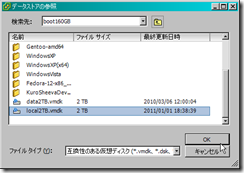
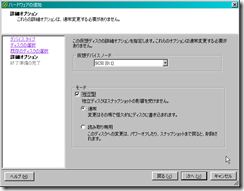
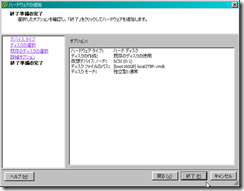
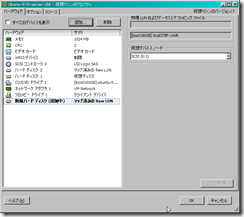
ここで生成された、local2TB.vmdk をVMに追加してやれば、
VMからST32000542ASが直接見れる。
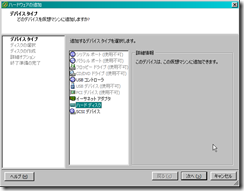
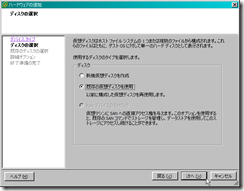
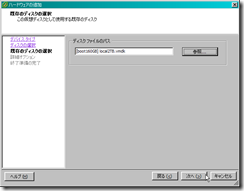
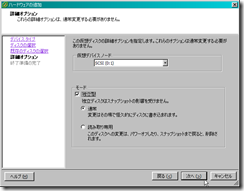
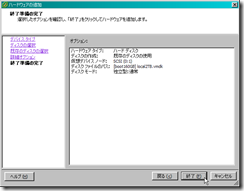
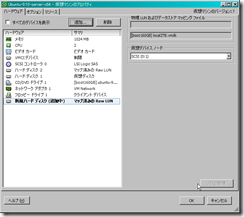
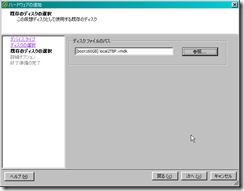
追加の仕方は普通のディスクの追加と同じ。
でOK。
追加したVMのdmesgを見てみると・・・
user@ubuntu9-server:~$ dmesg

・・・

[   14.882030] NFSD: Using /var/lib/nfs/v4recovery as the NFSv4 state recovery directory

[   14.894552] NFSD: starting 90-second grace period

[   20.333002] eth0: no IPv6 routers present

[ 3007.310762] mptsas: ioc0: attaching ssp device: fw_channel 0, fw_id 1, phy 1, sas_addr 0x5000c29887c3d155

[ 3007.310927] scsi 2:0:1:0: Direct-Access     VMware   Virtual disk     1.0  PQ: 0 ANSI: 2

[ 3007.311219] sd 2:0:1:0: Attached scsi generic sg3 type 0

[ 3007.314440] sd 2:0:1:0: [sdc] 3907029168 512-byte logical blocks: (2.00 TB/1.81 TiB)

[ 3007.314478] sd 2:0:1:0: [sdc] Write Protect is off

[ 3007.314481] sd 2:0:1:0: [sdc] Mode Sense: 03 00 00 00

[ 3007.314516] sd 2:0:1:0: [sdc] Cache data unavailable

[ 3007.314518] sd 2:0:1:0: [sdc] Assuming drive cache: write through

[ 3007.315698] sd 2:0:1:0: [sdc] Cache data unavailable

[ 3007.315701] sd 2:0:1:0: [sdc] Assuming drive cache: write through

[ 3007.315787]  sdc:

[ 3007.318769] sd 2:0:1:0: [sdc] Cache data unavailable

[ 3007.318772] sd 2:0:1:0: [sdc] Assuming drive cache: write through

[ 3007.318858] sd 2:0:1:0: [sdc] Attached SCSI disk

user@ubuntu9-server:~$
認識してる!
早速、smartctlを。
user@ubuntu9-server:~$ smartctl -a /dev/sdc

smartctl version 5.38 [x86_64-unknown-linux-gnu] Copyright (C) 2002-8 Bruce Allen

Home page is http://smartmontools.sourceforge.net/
Smartctl open device: /dev/sdc failed: Permission denied
失敗。
user@ubuntu9-server:~$ sudo smartctl -a /dev/sdc

smartctl version 5.38 [x86_64-unknown-linux-gnu] Copyright (C) 2002-8 Bruce Allen

Home page is http://smartmontools.sourceforge.net/
Device: VMware Virtual disk Version: 1.0
Serial number: 6000c29887c3d15500e513b56b126d3e
Device type: disk
Local Time is: Sat Jan 1 18:52:27 2011 JST
Device does not support SMART
Error Counter logging not supported
Device does not support Self Test logging
ん?見れない??
そういえば、さっきのdmesgもST32000542ASと表示されず、VMWare diskになってたな。。
・・・

[ 3007.310927] scsi 2:0:1:0: Direct-Access     VMware   Virtual disk     1.0  PQ: 0 ANSI: 2

・・・
直接は見れないのかぁ。。。と思いきや、「Creating RDMs on SATA drives」にはもう少し続きがあった。
「CREATING A PHYSICAL RDM」物理RDM?
さっき打ったコマンドの 「-r」 を 「-z」に変更する。vmdkのファイル名を少し変更。
/vmfs/volumes/4b6d9e06-eacb4270-750d-002185ac0e72 # vmkfstools -z /vmfs/devices/disks/vml.01000000002020202020202020202020203558573239434c52535433323030 local2TBP.vmdk -a lsilogic

/vmfs/volumes/4b6d9e06-eacb4270-750d-002185ac0e72 # ls -l

・・・

-rw-------    1 root     root      2000398934016 Jan  1 09:38 local2TB-rdm.vmdk

-rw-------    1 root     root                487 Jan  1 09:38 local2TB.vmdk

-rw-------    1 root     root      2000398934016 Jan  1 11:04 local2TBP-rdmp.vmdk

-rw-------    1 root     root                500 Jan  1 11:04 local2TBP.vmdk

/vmfs/volumes/4b6d9e06-eacb4270-750d-002185ac0e72 # vmkfstools
# P付きが、Physical RDM
さっき追加した、local2TB.vmdkの方は、VMから削除して、
今度は、local2TBP.vmdkの方を追加。
再度、dmesg。
user@ubuntu9-server:~$ dmesg

・・・

Jan  1 20:10:57 ubuntu9-server kernel: [ 8018.592851] mptsas: ioc0: attaching ssp device: fw_channel 0, fw_id 1, phy 1, sas_addr 0x5000c29fabf8d855

Jan  1 20:10:57 ubuntu9-server kernel: [ 8018.593019] scsi 2:0:3:0: Direct-Access     ATA      ST32000542AS     CC34 PQ: 0 ANSI: 5

Jan  1 20:10:57 ubuntu9-server kernel: [ 8018.593305] sd 2:0:3:0: Attached scsi generic sg3 type 0

Jan  1 20:10:57 ubuntu9-server kernel: [ 8018.594278] sd 2:0:3:0: [sdc] 3907029168 512-byte logical blocks: (2.00 TB/1.81 TiB)

Jan  1 20:10:57 ubuntu9-server kernel: [ 8018.594443] sd 2:0:3:0: [sdc] Write Protect is off

Jan  1 20:10:57 ubuntu9-server kernel: [ 8018.594476] sd 2:0:3:0: [sdc] Cache data unavailable

Jan  1 20:10:57 ubuntu9-server kernel: [ 8018.594874] sd 2:0:3:0: [sdc] Cache data unavailable

Jan  1 20:10:57 ubuntu9-server kernel: [ 8018.595119]  sdc:

Jan  1 20:10:57 ubuntu9-server kernel: [ 8018.596565] sd 2:0:3:0: [sdc] Cache data unavailable

Jan  1 20:10:57 ubuntu9-server kernel: [ 8018.596755] sd 2:0:3:0: [sdc] Attached SCSI disk
ST32000542ASって出た!!
再度、smartctl。
user@ubuntu9-server:~$ sudo smartctl -a /dev/sdc

smartctl version 5.38 [x86_64-unknown-linux-gnu] Copyright (C) 2002-8 Bruce Allen

Home page is http://smartmontools.sourceforge.net/
=== START OF INFORMATION SECTION ===
Device Model: ST32000542AS
Serial Number: 5XW29CLR
Firmware Version: CC34
User Capacity: 2,000,398,934,016 bytes
Device is: Not in smartctl database [for details use: -P showall]
ATA Version is: 8
ATA Standard is: ATA-8-ACS revision 4
Local Time is: Sat Jan 1 20:11:15 2011 JST
SMART support is: Available - device has SMART capability.
SMART support is: Enabled
=== START OF READ SMART DATA SECTION ===
SMART overall-health self-assessment test result: PASSED
General SMART Values:
Offline data collection status: (0x00) Offline data collection activity
was never started.
Auto Offline Data Collection: Disabled.
Self-test execution status: ( 0) The previous self-test routine completed
without error or no self-test has ever
been run.
Total time to complete Offline
data collection: ( 633) seconds.
Offline data collection
capabilities: (0x73) SMART execute Offline immediate.
Auto Offline data collection on/off support.
Suspend Offline collection upon new
command.
No Offline surface scan supported.
Self-test supported.
Conveyance Self-test supported.
Selective Self-test supported.
SMART capabilities: (0x0003) Saves SMART data before entering
power-saving mode.
Supports SMART auto save timer.
Error logging capability: (0x01) Error logging supported.
General Purpose Logging supported.
Short self-test routine
recommended polling time: ( 1) minutes.
Extended self-test routine
recommended polling time: ( 255) minutes.
Conveyance self-test routine
recommended polling time: ( 2) minutes.
SCT capabilities: (0x103f) SCT Status supported.
SCT Feature Control supported.
SCT Data Table supported.
SMART Attributes Data Structure revision number: 10
Vendor Specific SMART Attributes with Thresholds:
ID# ATTRIBUTE_NAME FLAG VALUE WORST THRESH TYPE UPDATED WHEN_FAILED RAW_VALUE
1 Raw_Read_Error_Rate 0x000f 100 100 006 Pre-fail Always - 291145
3 Spin_Up_Time 0x0003 100 100 000 Pre-fail Always - 0
4 Start_Stop_Count 0x0032 100 100 020 Old_age Always - 3
5 Reallocated_Sector_Ct 0x0033 100 100 036 Pre-fail Always - 0
7 Seek_Error_Rate 0x000f 100 253 030 Pre-fail Always - 319
9 Power_On_Hours 0x0032 100 100 000 Old_age Always - 2
10 Spin_Retry_Count 0x0013 100 100 097 Pre-fail Always - 0
12 Power_Cycle_Count 0x0032 100 100 020 Old_age Always - 3
183 Unknown_Attribute 0x0032 100 100 000 Old_age Always - 0
184 Unknown_Attribute 0x0032 100 100 099 Old_age Always - 0
187 Reported_Uncorrect 0x0032 100 100 000 Old_age Always - 0
188 Unknown_Attribute 0x0032 100 100 000 Old_age Always - 0
189 High_Fly_Writes 0x003a 100 100 000 Old_age Always - 0
190 Airflow_Temperature_Cel 0x0022 067 067 045 Old_age Always - 33 (Lifetime Min/Max 23/33)
194 Temperature_Celsius 0x0022 033 040 000 Old_age Always - 33 (0 23 0 0)
195 Hardware_ECC_Recovered 0x001a 100 100 000 Old_age Always - 291145
197 Current_Pending_Sector 0x0012 100 100 000 Old_age Always - 0
198 Offline_Uncorrectable 0x0010 100 100 000 Old_age Offline - 0
199 UDMA_CRC_Error_Count 0x003e 200 200 000 Old_age Always - 0
240 Head_Flying_Hours 0x0000 100 253 000 Old_age Offline - 213880781406216
241 Unknown_Attribute 0x0000 100 253 000 Old_age Offline - 94729
242 Unknown_Attribute 0x0000 100 253 000 Old_age Offline - 279649
SMART Error Log Version: 1
No Errors Logged
SMART Self-test log structure revision number 1
No self-tests have been logged. [To run self-tests, use: smartctl -t]
SMART Selective self-test log data structure revision number 1
SPAN MIN_LBA MAX_LBA CURRENT_TEST_STATUS
1 0 0 Not_testing
2 0 0 Not_testing
3 0 0 Not_testing
4 0 0 Not_testing
5 0 0 Not_testing
Selective self-test flags (0x0):
After scanning selected spans, do NOT read-scan remainder of disk.
If Selective self-test is pending on power-up, resume after 0 minute delay.
表示された!!!
ちなみに、local2TB.vmdk と local2TBP.vmdk の差分は、、、
/vmfs/volumes/4b6d9e06-eacb4270-750d-002185ac0e72 # diff local2TB.vmdk local2TBP.vmdk

--- local2TB.vmdk       Sat Jan  1 09:38:39 2011

+++ local2TBP.vmdk      Sat Jan  1 11:04:11 2011

@@ -4,17 +4,17 @@

 CID=fffffffe

 parentCID=ffffffff

 isNativeSnapshot="no"

-createType="vmfsRawDeviceMap"

+createType="vmfsPassthroughRawDeviceMap"
# Extent description
-RW 3907029168 VMFSRDM "local2TB-rdm.vmdk"
+RW 3907029168 VMFSRDM "local2TBP-rdmp.vmdk"
# The Disk Data Base
#DDB
ddb.virtualHWVersion = "7"
-ddb.longContentID = "94833bd14febd3f8396ba2b4fffffffe"
-ddb.uuid = "60 00 C2 98 87 c3 d1 55-00 e5 13 b5 6b 12 6d 3e"
+ddb.longContentID = "cf340ce4da3d573f4b4cca74fffffffe"
+ddb.uuid = "60 00 C2 9f ab f8 d8 55-3d 71 19 0d c9 89 94 2f"
ddb.geometry.cylinders = "243201"
ddb.geometry.heads = "255"
ddb.geometry.sectors = "63"
createTypeだけっぽい。

